Concrete Imprinting

Skilled application of concrete imprinting to create durable, decorative surfaces with the look of stone, brick, or custom patterns

Tailored Solutions to Suit Your Preferences and Maintenance Needs

By using advanced decorative imprinting techniques, we transform ordinary concrete into stunning, custom-designed surfaces that mimic the look of natural stone, brick, tile, or even custom patterns. Ideal for driveways, walkways, patios, and other outdoor areas, concrete imprinting combines the strength and longevity of concrete with the aesthetic versatility of high-end materials, providing a cost-effective and low-maintenance solution for beautifying your landscape.

Key Features of Our Service

feature 1

Customized Design Consultation

We start with a detailed consultation to understand your design preferences, functional needs, and the specific characteristics of your space. Our team works closely with you to create a custom imprinting design that complements your landscape and reflects your personal style.

feature 3

Color Customization

Beyond patterns and textures, we offer a wide variety of color options to enhance the realism and beauty of your imprinted concrete. Our color treatments are designed to be long-lasting and resistant to fading, ensuring that your surfaces retain their vibrant appearance over time.

feature 2

Wide Range of Patterns & Textures

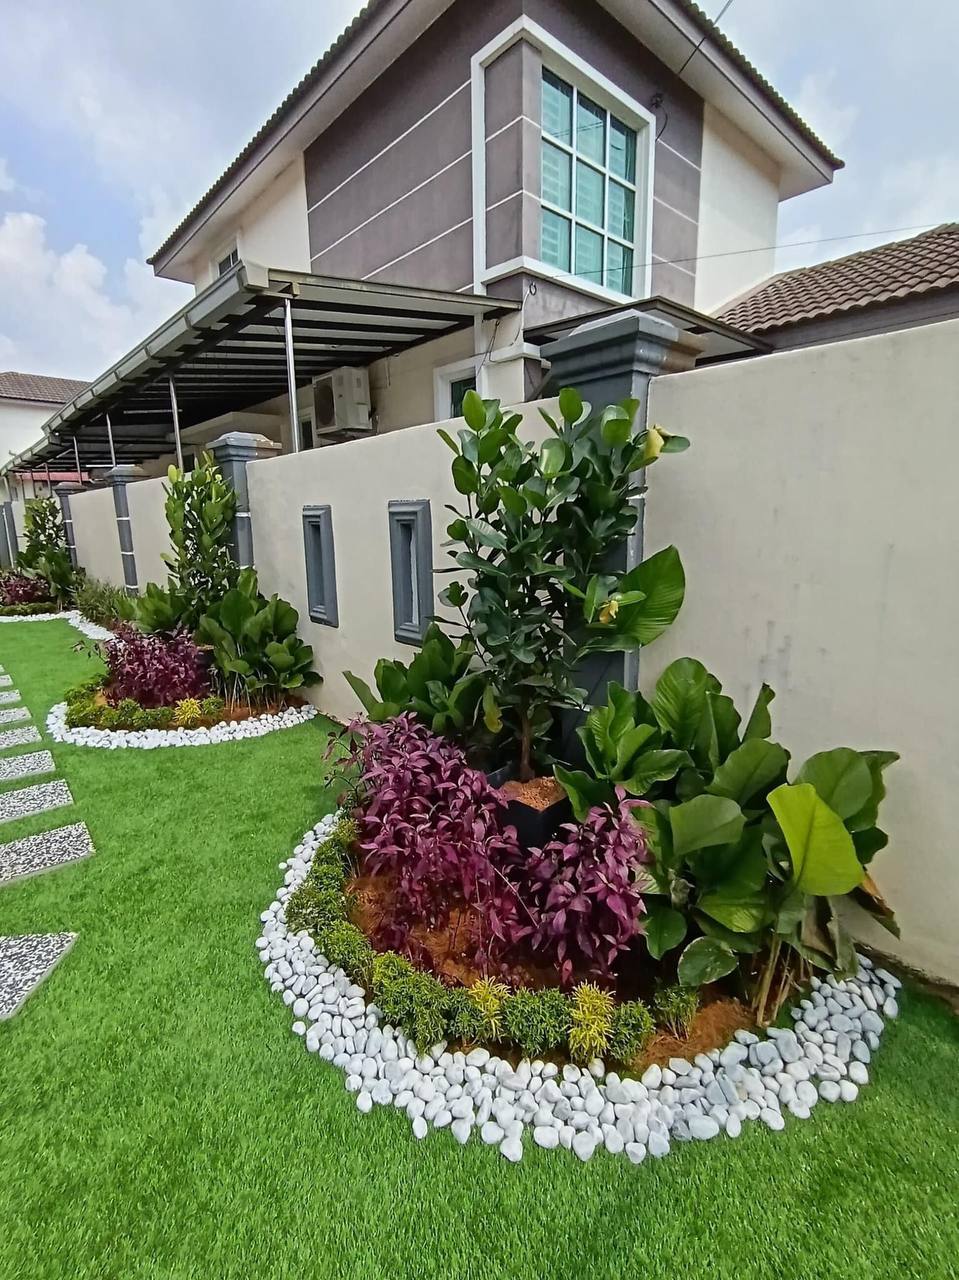
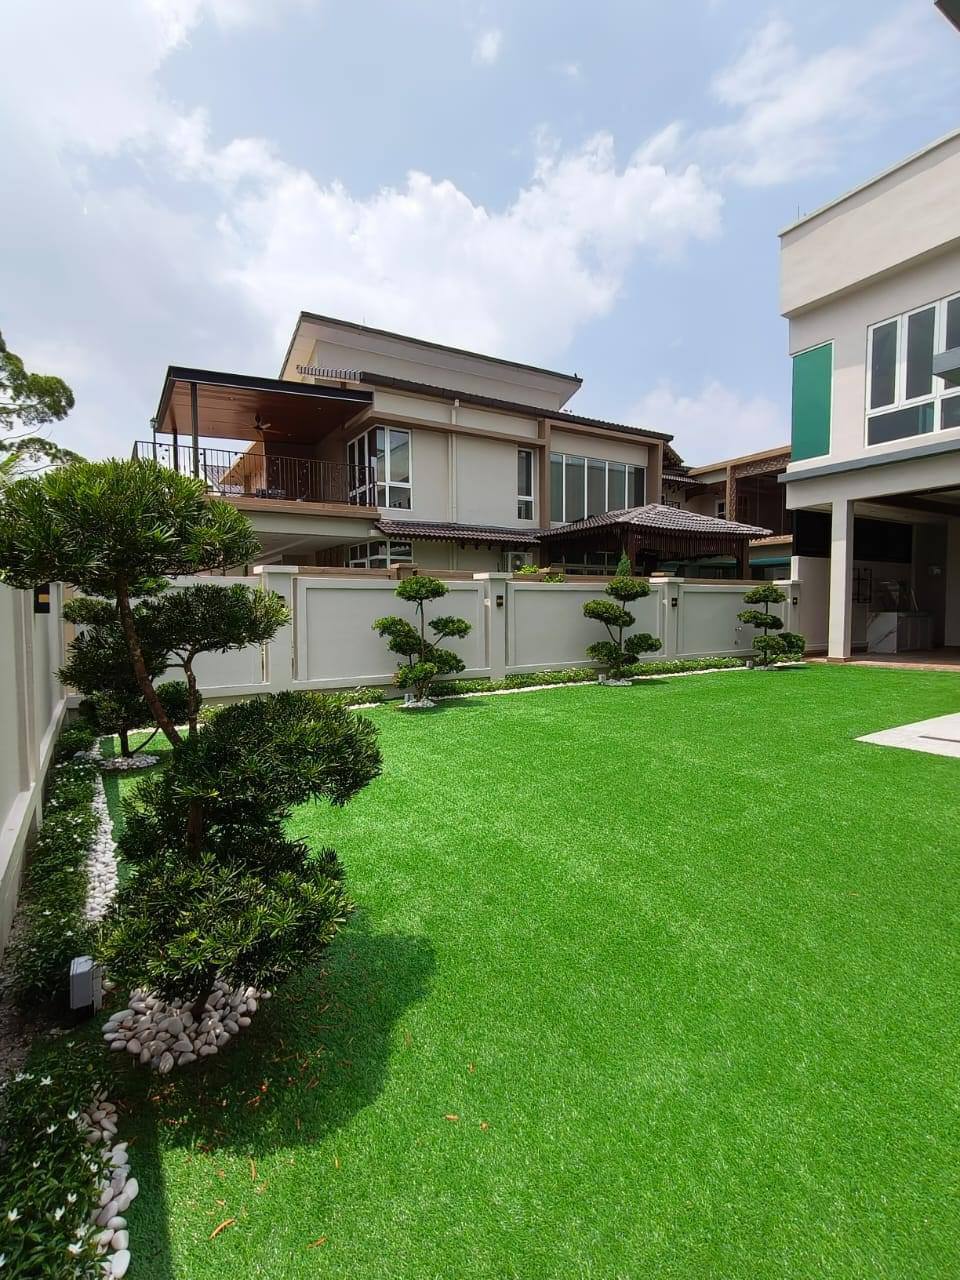
Our concrete imprinting techniques offer a vast selection of patterns and textures, from classic cobblestone and slate to intricate geometric designs. We can replicate the appearance of natural materials like stone, brick, and wood, or create entirely unique patterns that set your space apart.

feature 4

Durability & Longevity

Concrete imprinting is not only about aesthetics—it’s also about creating surfaces that are built to last. The concrete used in our imprinting process is highly durable, capable of withstanding heavy foot traffic, vehicular loads, and harsh weather conditions without cracking or deteriorating.

feature 5

Seamless Integration

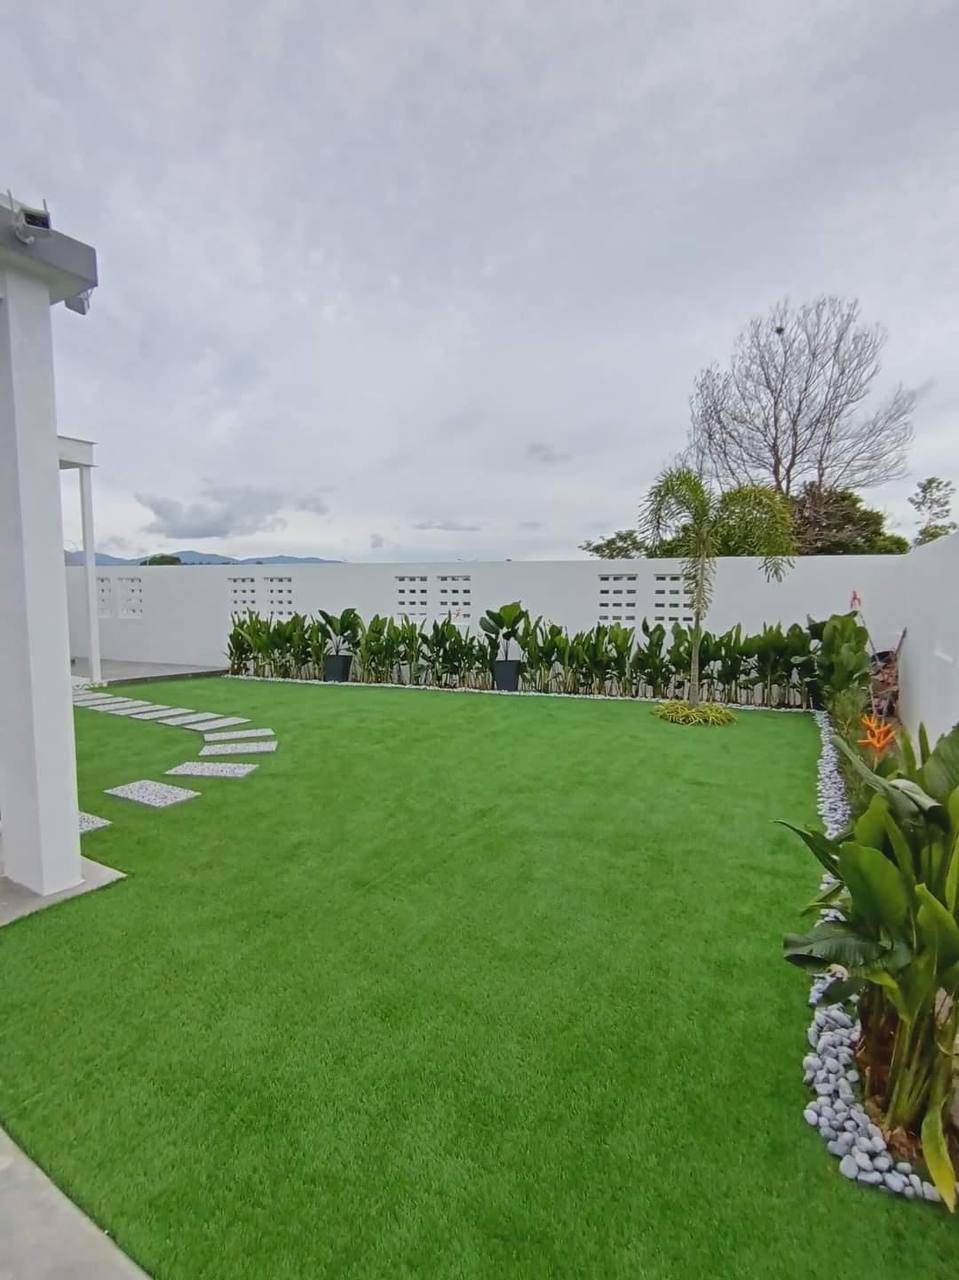
Our imprinting process ensures a seamless integration with your existing landscape features, such as garden beds, retaining walls, and water features. We carefully design and install the concrete to flow naturally within your space, enhancing the overall harmony and functionality of your landscape.

feature 6

Low Maintenance

One of the key benefits of imprinted concrete is its low maintenance requirements. Unlike natural stone or brick, which may require regular sealing or repairs, imprinted concrete is easy to clean and maintain, retaining its beauty with minimal effort.

feature 7

Slip-Resistant Finishes

Safety is a priority in our designs. We offer slip-resistant finishes that add texture to your imprinted concrete, making it safer to walk on in wet or icy conditions. This is especially important for areas like driveways, walkways, and pool decks.

feature 8

Quick Installation

Our team is trained in efficient concrete imprinting techniques, allowing us to complete projects quickly without compromising on quality. We minimize disruption to your daily life while delivering a beautifully finished product that exceeds your expectations.

feature 9

Cost-Effective Solution

Concrete imprinting offers the luxurious look of high-end materials at a fraction of the cost. It’s an economical option for homeowners and businesses looking to upgrade their outdoor spaces without exceeding their budget.

Concrete Imprinting Installation Process

STEP 1

Initial Consultation & Site Assessment

  1. Consultation: Our process begins with a detailed consultation to understand your vision, design preferences, and the specific requirements of your project. We’ll discuss color schemes, patterns, textures, and any custom design elements you wish to incorporate.
  2. Site Assessment: We conduct a thorough site assessment to evaluate the existing surface conditions, check for any structural issues, and measure the area to be imprinted. This helps us prepare for a smooth installation and ensures the final result meets your expectations.

step 3

Surface Preparation

  1. Existing Surface Removal: If necessary, we remove any existing surface materials, such as old concrete, asphalt, or paving stones, to ensure a clean and stable base for the new concrete.
  2. Grading and Compaction: The sub-base is graded and compacted to create a level and solid foundation for the concrete. Proper grading is crucial for ensuring water drainage and preventing future issues like cracking or uneven settling.
  3. Formwork Installation: We install formwork (wooden or metal frames) around the area to contain the concrete and shape the edges. This is essential for achieving clean, precise lines and maintaining the integrity of the design.

step 5

Adding Color & Base Texture

  1. Coloring Agents: While the concrete is still wet, we apply color hardeners or integral coloring agents. These materials are worked into the surface to achieve the desired hue and ensure long-lasting color that won’t fade or wear away.
  2. Base Texture: Before imprinting, we may apply a base texture to the concrete using rollers or trowels. This adds depth and enhances the overall appearance of the final pattern.

step 7

Curing the Concrete

  1. Initial Curing: After imprinting, the concrete needs to cure properly to achieve its full strength and durability. We protect the surface with curing agents or coverings to prevent rapid drying and cracking.
  2. Sealing the Surface: Once the concrete has cured sufficiently, we apply a high-quality sealant to protect the surface from stains, moisture, and wear. The sealant also enhances the color and provides a glossy or matte finish, depending on your preference.

step 9

Final Inspection & Cleanup

  1. Quality Inspection: After the installation is complete, we conduct a thorough inspection to ensure the concrete meets our high standards of quality and craftsmanship. We check for consistency in color, pattern alignment, and overall finish.
  2. Cleanup: Our team cleans up the site, removing any debris, tools, and formwork. We leave the area neat and tidy, with your newly imprinted concrete surface ready to be admired.

step 2

Design Selection & Planning

  1. Design Selection: Based on your preferences, we help you select the ideal pattern, color, and texture for your concrete surface. Options include a wide variety of designs, such as brick, cobblestone, slate, wood planks, and more.
  2. Mock-Up: For complex projects or custom designs, we can create a mock-up to give you a visual representation of how the finished product will look. This allows you to make any adjustments before the work begins.
  3. Project Planning: We create a detailed project plan that includes timelines, material requirements, and any preparatory work needed. You’ll receive a clear schedule, so you know what to expect at each stage of the process.

step 4

Concrete Mixing & Pouring

  1. Mixing the Concrete: We use a high-quality concrete mix, tailored to the specific needs of your project. The mix is prepared on-site to ensure the correct consistency and to allow for any necessary adjustments.
  2. Pouring the Concrete: The concrete is carefully poured into the prepared area, filling the forms and ensuring an even distribution. Our team uses specialized tools to spread and level the concrete, achieving a smooth surface.

step 6

Imprinting the Concrete

  1. Pattern Imprinting: With the concrete in the optimal state (neither too wet nor too dry), we begin the imprinting process. Specially designed stamping mats are carefully pressed into the concrete, creating the desired pattern and texture.
  2. Alignment and Precision: Our team ensures that each stamp is perfectly aligned to create a seamless and continuous pattern. Attention to detail at this stage is crucial for achieving a professional and aesthetically pleasing result.
  3. Detailing: We use hand tools to enhance specific areas and add intricate details to the pattern, ensuring the final design looks natural and authentic.

step 8

Joint Cutting

  1. Expansion Joints: To prevent cracking, we cut expansion joints into the concrete at specific intervals. These joints allow the concrete to expand and contract with temperature changes, maintaining the integrity of the surface.
  2. Custom Joint Design: The joints are carefully planned and cut to blend seamlessly with the pattern, ensuring they don’t detract from the overall appearance of the imprinted surface.

step 10

Post-Installation Care & Maintenance

  1. Care Instructions: We provide you with detailed instructions on how to care for and maintain your new concrete surface. This includes tips on cleaning, resealing, and protecting the surface to ensure its longevity.
  2. Ongoing Support: Should you have any questions or need assistance with maintenance in the future, our team is always available to help. We also offer periodic maintenance services to keep your concrete looking its best for years to come.

Our Works

Custom Quotation

reach out to us, we will help you achieve your desired space

Custom Quotation

reach out to us, we will help you achieve your desired space